AdSense Tracker v1.2 released August 4, 2023
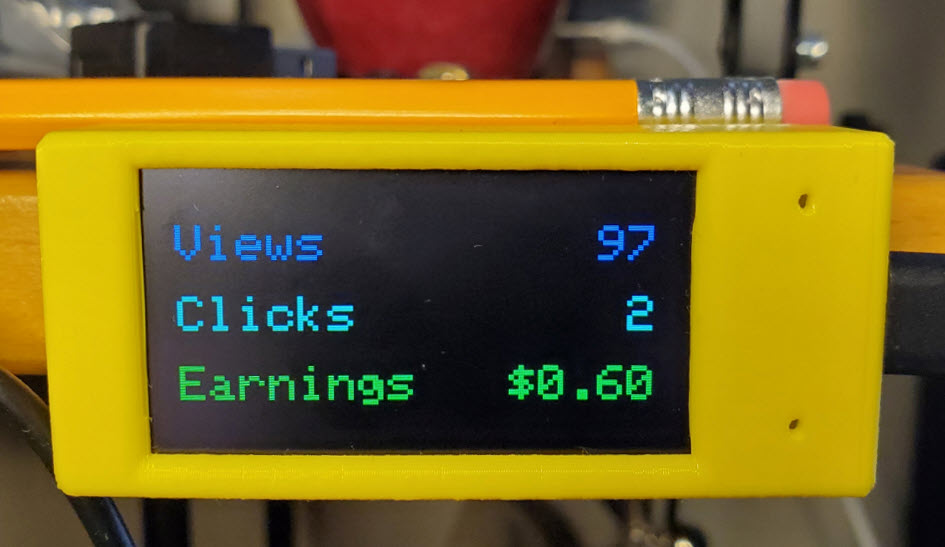
AdSense Tracker is an open source project to monitor Google AdSense views, clicks and earnings, and display them on an ESP32 TFT display.
Here's an example:
Here's what's needed to put the project together:
Arduino IDE 2.1.1 (or greater),
a running instance of MQTT (pretty much any version),
Google Adsense and Cloud developer (API dashboard) accounts,
the open source software from github.com/roblatour/adsensetracker,
a computer running Windows 11,
an ESP32 with a TFT Display; this project was developed and tested using a LilyGo T-Display S3, and
if you do use a LilyGo T-Display S3, optionally a 3D printable case like this one or this other one or a case from LilyGo for it.
Here's how the project is put together:
1. From the Google API Dashboard a Google developer project is set up to allow access to your Google AdSense data. The Google developer project should enable the Google AdSense Management APi (the process for which is described by Google here). Within the Google Developer dashboard you will need to provide for OAUTH Desktop access and you will need a Client ID and Secret.
2. A MQTT Server is setup (if you don't already have one setup). From this you will need your MQTT url or MQTT IP address, port, user id and password.
3. Download and unzip the open source software from github (link above).
4. Run the program WinAdSenseTrackerSetup.exe found within 'Signed setup file' folder, or alternatively you can use Visual Studio 2022 (Community Edition or above) to build your own executable from the source provided.
5. Run the WinAdSenseTracker program.
On first use you may be prompted to have the Microsoft .Net runtime environment installed.
Also on first use a Settings screen will appear on which you enter the information from steps 1 and 2 above. Once done click 'OK' and you will be prompted through the Google authorization process to provide access to the app to your Google AdSense data. This should only need to happen once.
6. The program then runs on Windows in the background but will be accessible via the Windows systray (bottom right of the screen near the system clock). From here, to open it you can double click on the program's icon which looks like this:
![]()
and it will bring up the Main window which looks like this:
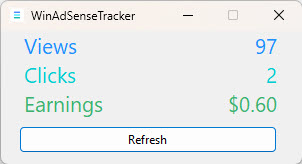
Alternatively, you can right click on the program's systray icon to bring up a small menu, from which you can further click to show the program's Main window, the Settings screen, an About window, or exit the program.
The program retrieves and publishes via MQTT the AdSense information on start up, every x minutes (as specified in your settings), a second after midnight to reset the daily totals, and on demand when either the 'Refresh' button is clicked on the Windows app's Main window or the top button is pressed on the LilyGo T-Display S3.
With the program running, the main window can be opened, in either of the two ways described above, and you can see your current daily total page views, clicks and revenue. The window can be minimized, and it will continue to run in the background, or you can close it to exit the program.
If you want to have the WinAdSenseTracker program automatically start when you log on to Windows, a shortcut to it can be placed in the C:\ProgramData\Microsoft\Windows\Start Menu\Programs\Startup folder. If you want to start the program every time your computer turns on, you can set that up via Windows Task Scheduler.
7. The Arduino IDE is used to load the open source Arduino sketch esp32Adsense.ino. Once loaded into the Arduino IDE the .ino file is the secrets.h file is edited to include your Wi-Fi and MQTT server credentials. The Arduino project is then built and uploaded to the ESP32.
8. On startup the ESP32 will send a request via MQTT to get the latest retrieved AdSense data. Once done it will refresh its display with that information. It will also subscribe so that it gets the AdSense data published from your MQTT server, and will immediately refresh it on the ESP32's display when it comes in.
An important note:
The windows side program stores your settings information and Google refresh tokens etc. in plain text. The Arduino side program stores your Wi-Fi and MQTT credentials in plane text in the secret.h file and in the flash memory of the ESP32.
A word about all this complexity:
My goal for this project was to display my AdSense data on my LilyGo T-Display S3 and to share how I did this with you!
However, to get at the AdSense data Google requires the user to go through an authorization process specific to the device type being used. For an ESP32 there is a supported authorization process, but sadly it limits the scope of the information that can be retrieved (excluding the AdSense data). Accordingly, the Windows app is needed to provide for the required authorization for the job. I'm guessing there is perhaps a way around this once the authorization is received the first time around, but hey I'd rather play within Google's rules.
In another project ( https://rlatour.com/cpumonitorjr ) I coded for a direct link between the Windows app and the ESP32. So why did I use MQTT for this one? Well, using the Windows app to retrieve the AdSense data and then publishing it via MQTT allows the data to displayed on multiple ESP32s with as few calls to Google for that data as possible. Also, should the need arise, the ESP32 side of things can easily be re-purposed to display other MQTT published data.
I have also written other programs that do encrypt the data stored on the Windows side. So why didn't I do that in this case? In short, it is because this program is open source and the others are not. Making a program open source effectively provides an open and detailed view of how the program encrypts and decrypts data; making the encrypted data much easier to decrypt by hackers - limiting the effectiveness encryption safeguards (unless perhaps a password is used every time the program is started, which for this projected seemed impractical) and perhaps offering some a false sense of security.
I hope this project will be of good use to you!
Support
Support is available from here
Feedback
Feedback is welcome - info@rlatour.com
| Donations are appreciated! |
Other great software by me:
A Ruler for Windows
Push2Run SetVol
CallClerk ...and more
Copyright 2023 Rob Latour
Privacy and Cookie Statement